イントロダクションIntroduction
Note: Laravel Horizonを掘り下げる前に、Laravelの基本的なキューサービスをよく理解しておく必要があります。Horizonは、Laravelが提供する基本的なキュー機能にまだ慣れていない場合は混乱してしまう可能性がある追加機能であり、Laravelのキューを拡張します。[!NOTE] Before digging into Laravel Horizon, you should familiarize yourself with Laravel's base queue services[/docs/{{version}}/queues]. Horizon augments Laravel's queue with additional features that may be confusing if you are not already familiar with the basic queue features offered by Laravel.
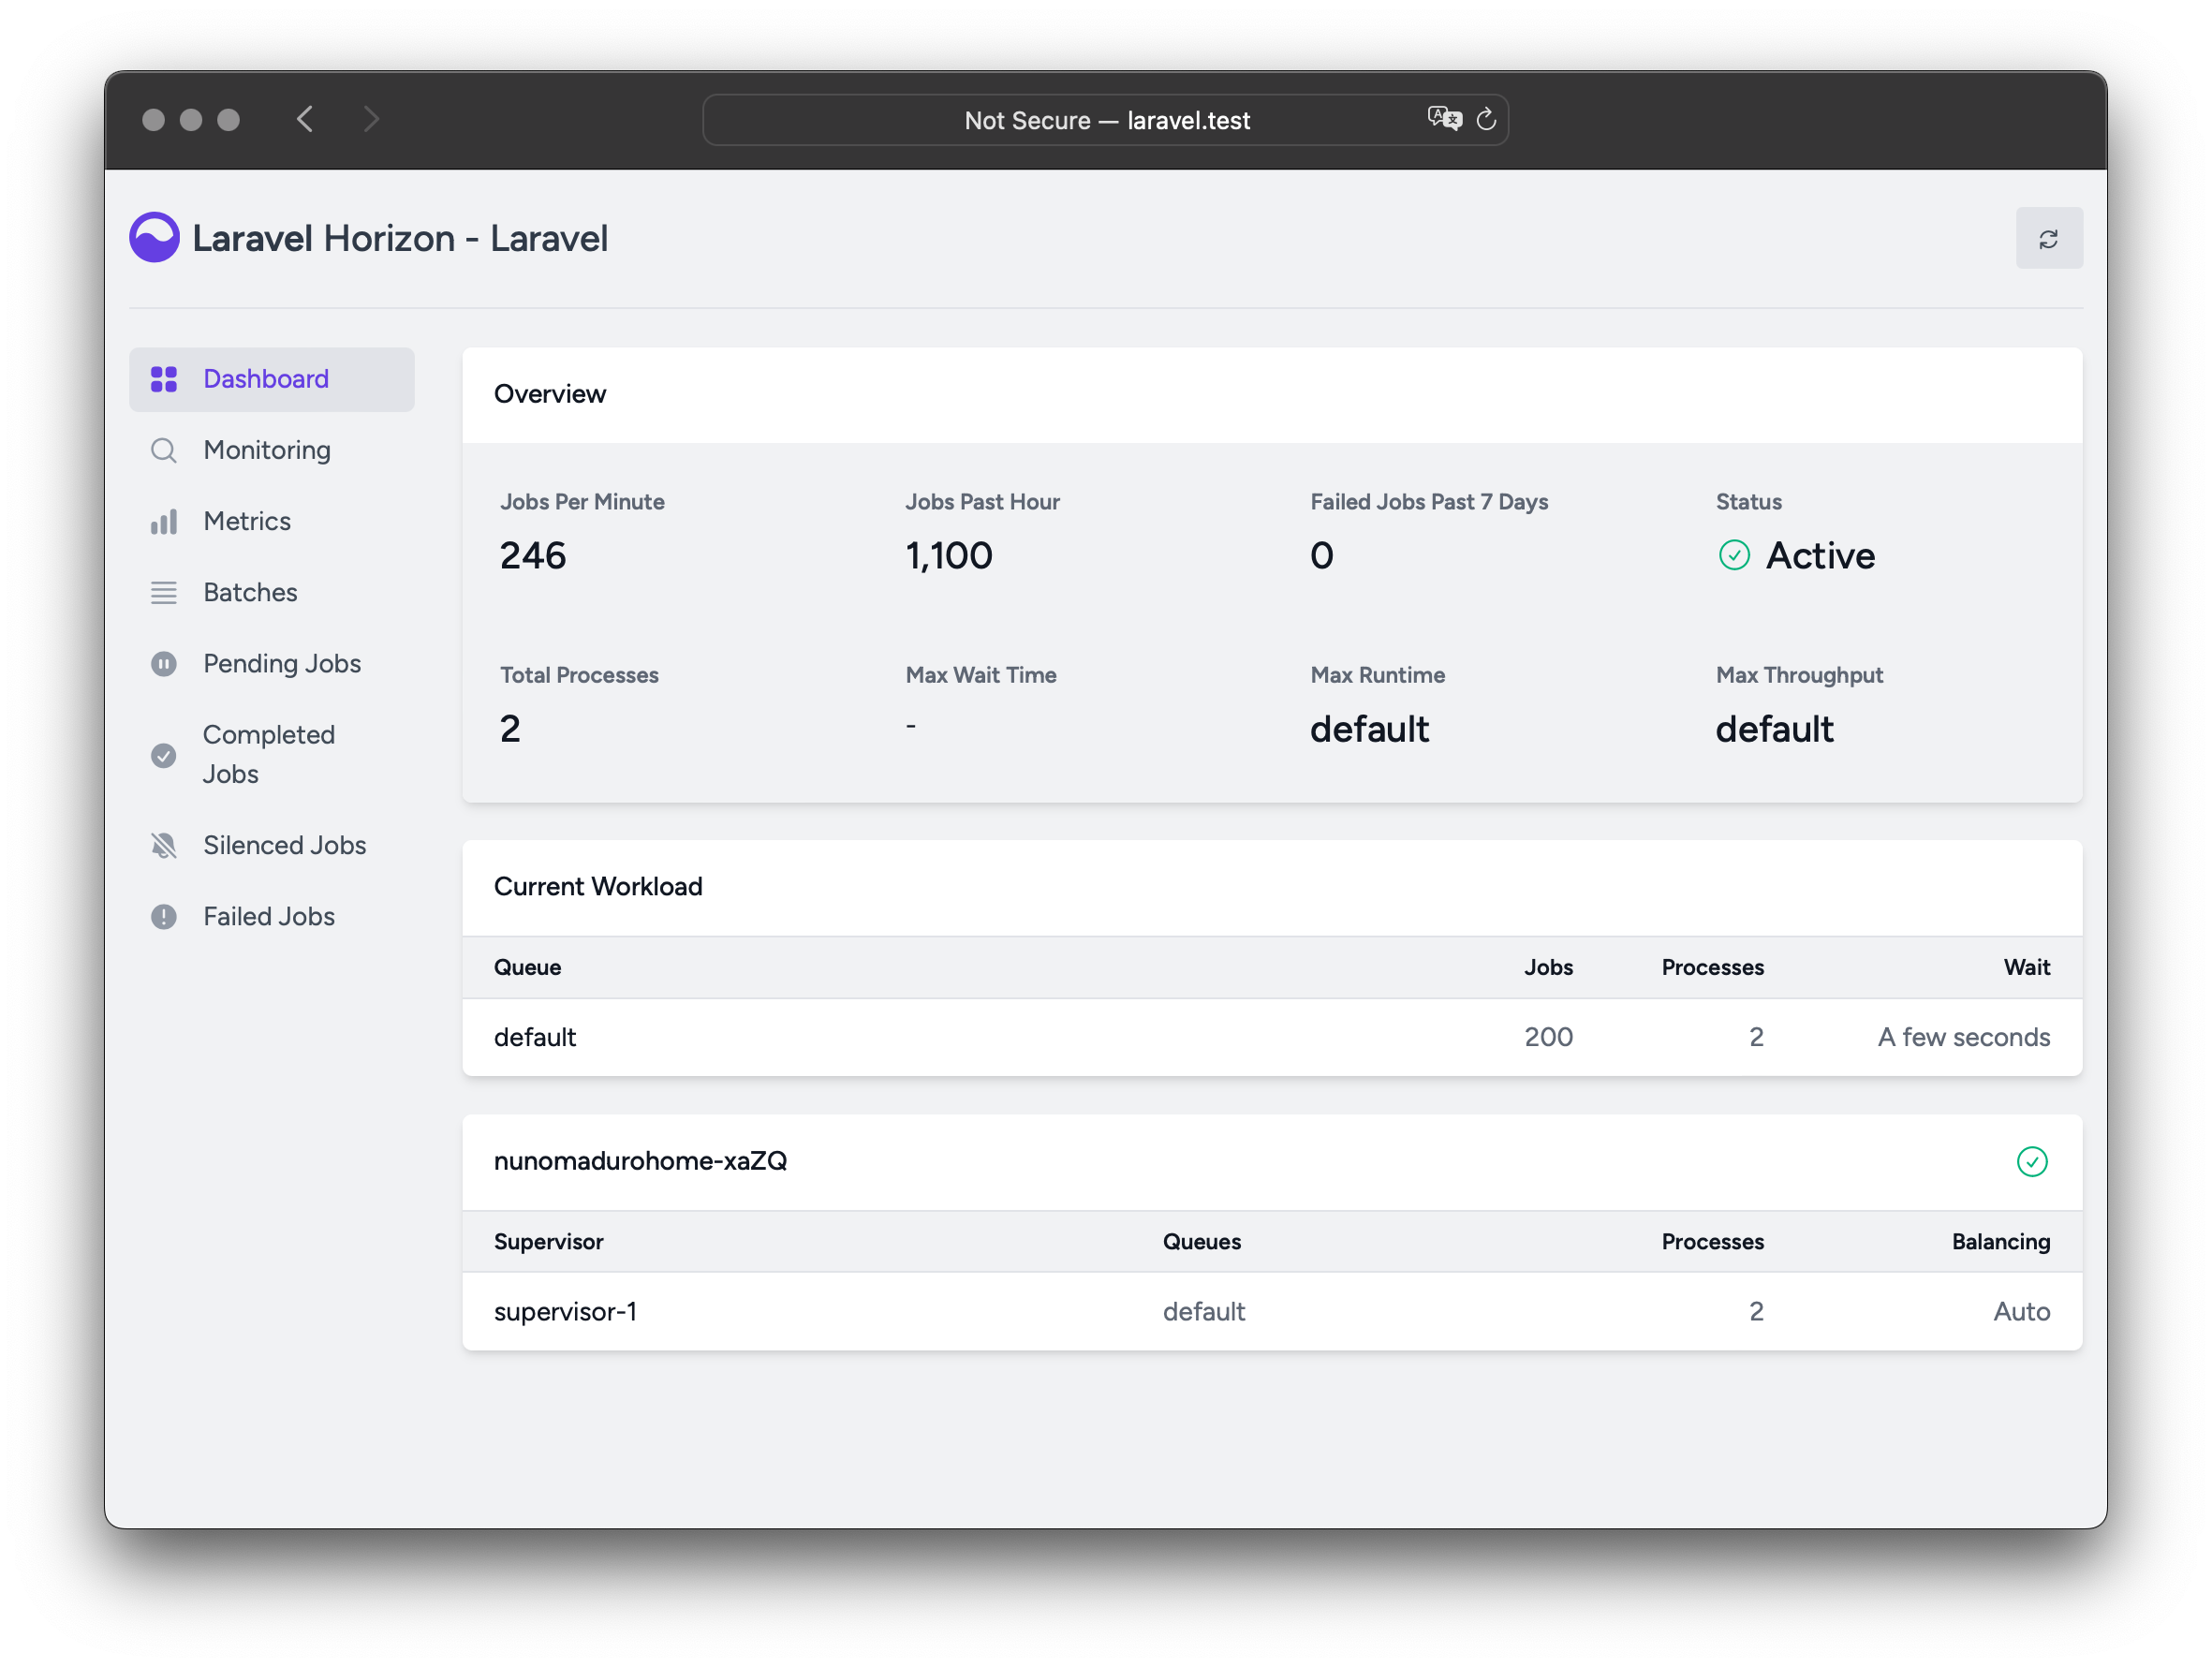
Laravel Horizon(ホライズン、地平線)は、Laravelを利用したRedisキューに美しいダッシュボードとコード駆動型の設定を提供します。Horizonを使用すると、ジョブのスループット、ランタイム、ジョブの失敗など、キューシステムの主要なメトリックを簡単に監視できます。Laravel Horizon[https://github.com/laravel/horizon] provides a beautiful dashboard and code-driven configuration for your Laravel powered Redis queues[/docs/{{version}}/queues]. Horizon allows you to easily monitor key metrics of your queue system such as job throughput, runtime, and job failures.
Horizonを使用する場合、すべてのキューワーカ設定は単一の単純な設定ファイルへ保存します。バージョン管理されたファイルでアプリケーションのワーカ設定を定義することにより、アプリケーションのデプロイ時に、キューワーカを簡単にスケーリングや変更できます。When using Horizon, all of your queue worker configuration is stored in a single, simple configuration file. By defining your application's worker configuration in a version controlled file, you may easily scale or modify your application's queue workers when deploying your application.
インストールInstallation
Warning! Laravel Horizonは、Redisを使用してキューを使用する必要があります。したがって、アプリケーションの
config/queue.php設定ファイルでキュー接続がredisに設定されていることを確認する必要があります。現時点でHorizonは、Redis Clusterと互換性がありません。[!WARNING] Laravel Horizon requires that you use Redis[https://redis.io] to power your queue. Therefore, you should ensure that your queue connection is set toredisin your application'sconfig/queue.phpconfiguration file. Horizon is not compatible with Redis Cluster at this time.
Composerパッケージマネージャを使用して、Horizonをプロジェクトにインストールします。You may install Horizon into your project using the Composer package manager:
composer require laravel/horizon
Horizonをインストールした後、horizon:install Artisanコマンドを使用してアセット公開します。After installing Horizon, publish its assets using the horizon:install Artisan command:
php artisan horizon:install
設定Configuration
Horizonのアセットを公開すると、そのプライマリ設定ファイルはconfig/horizon.phpへ設置されます。この設定ファイルでアプリケーションのキューワーカオプションを設定できます。各設定オプションにはその目的の説明が含まれているため、このファイルを徹底的に調べてください。After publishing Horizon's assets, its primary configuration file will be located at config/horizon.php. This configuration file allows you to configure the queue worker options for your application. Each configuration option includes a description of its purpose, so be sure to thoroughly explore this file.
Warning! Horizonは内部で
horizonという名前のRedis接続を使用します。このRedis接続名は予約語であり、database.php設定ファイル中で他のRedis接続に割り当てたり、horizon.php設定ファイルのuseオプションの値に使用したりしてはいけません。[!WARNING] Horizon uses a Redis connection namedhorizoninternally. This Redis connection name is reserved and should not be assigned to another Redis connection in thedatabase.phpconfiguration file or as the value of theuseoption in thehorizon.phpconfiguration file.
環境Environments
インストール後に、よく理解する必要のある主要なHorizon設定オプションは、environments設定オプションです。この設定オプションは、アプリケーションを実行する環境の配列であり、各環境のワーカプロセスオプションを定義します。デフォルトのこのエントリはproduction環境とlocal環境です。ただし、環境は必要に応じ自由に追加できます。After installation, the primary Horizon configuration option that you should familiarize yourself with is the environments configuration option. This configuration option is an array of environments that your application runs on and defines the worker process options for each environment. By default, this entry contains a production and local environment. However, you are free to add more environments as needed:
'environments' => [
    'production' => [
        'supervisor-1' => [
            'maxProcesses' => 10,
            'balanceMaxShift' => 1,
            'balanceCooldown' => 3,
        ],
    ],

    'local' => [
        'supervisor-1' => [
            'maxProcesses' => 3,
        ],
    ],
],
他に一致する環境が見つからない場合に使用する、ワイルドカード環境(*)を定義することもできます。You may also define a wildcard environment (*) which will be used when no other matching environment is found:
'environments' => [
    // ...

    '*' => [
        'supervisor-1' => [
            'maxProcesses' => 3,
        ],
    ],
],
Horizonを起動すると、アプリケーションを実行する環境のワーカプロセス設定オプションが使用されます。通常、環境はAPP_ENV環境変数の値によって決定されます。たとえば、デフォルトのlocal Horizon環境は、3つのワーカプロセスを開始し、各キューに割り当てられたワーカプロセスの数のバランスを自動的にとるように設定されています。デフォルトのproduction環境は、最大10個のワーカプロセスを開始し、各キューに割り当てられたワーカプロセスの数のバランスを自動的にとるように設定されています。When you start Horizon, it will use the worker process configuration options for the environment that your application is running on. Typically, the environment is determined by the value of the APP_ENV environment variable[/docs/{{version}}/configuration#determining-the-current-environment]. For example, the default local Horizon environment is configured to start three worker processes and automatically balance the number of worker processes assigned to each queue. The default production environment is configured to start a maximum of 10 worker processes and automatically balance the number of worker processes assigned to each queue.
Warning!
horizon設定ファイルのenvironments部分に、Horizonを実行する予定の各環境のエントリを確実に指定してください。[!WARNING] You should ensure that theenvironmentsportion of yourhorizonconfiguration file contains an entry for each environment[/docs/{{version}}/configuration#environment-configuration] on which you plan to run Horizon.
スーパーバイザSupervisors
Horizonのデフォルトの設定ファイルでわかるように。各環境には、1つ以上の「スーパーバイザ(supervisor)」を含めることができます。デフォルトでは、設定ファイルはこのスーパーバイザをsupervisor-1として定義します。ただし、スーパーバイザには自由に名前を付けることができます。各スーパーバイザは、基本的にワーカプロセスのグループを「監視」する責任があり、キュー間でワーカプロセスのバランスを取ります。As you can see in Horizon's default configuration file, each environment can contain one or more "supervisors". By default, the configuration file defines this supervisor as supervisor-1; however, you are free to name your supervisors whatever you want. Each supervisor is essentially responsible for "supervising" a group of worker processes and takes care of balancing worker processes across queues.
特定の環境で実行する必要があるワーカプロセスの新しいグループを定義する場合は、指定環境にスーパーバイザを追加します。アプリケーションが使用する特定のキューへ他のバランス戦略やワーカプロセス数を指定することもできます。You may add additional supervisors to a given environment if you would like to define a new group of worker processes that should run in that environment. You may choose to do this if you would like to define a different balancing strategy or worker process count for a given queue used by your application.
メンテナンスモードMaintenance Mode
アプリケーションが、メンテナンスモードにあるとき、Horizon設定ファイル内のスーパーバイザのforceオプションをtrueで定義していない限り、キューに投入するジョブをHorizonは処理しません。While your application is in maintenance mode[/docs/{{version}}/configuration#maintenance-mode], queued jobs will not be processed by Horizon unless the supervisor's force option is defined as true within the Horizon configuration file:
'environments' => [
    'production' => [
        'supervisor-1' => [
            // ...
            'force' => true,
        ],
    ],
],
デフォルト値Default Values
Horizonのデフォルト設定ファイル内に、defaults設定オプションがあります。この設定オプションにアプリケーションのスーパーバイザのデフォルト値を指定します。スーパーバイザのデフォルト設定値は、各環境のスーパーバイザの設定にマージされるため、スーパーバイザを定義するときに不必要な繰り返しを回避できます。Within Horizon's default configuration file, you will notice a defaults configuration option. This configuration option specifies the default values for your application's supervisors[#supervisors]. The supervisor's default configuration values will be merged into the supervisor's configuration for each environment, allowing you to avoid unnecessary repetition when defining your supervisors.
ダッシュボードの認可Dashboard Authorization
Horizonダッシュボードは、/horizonルートでアクセスできます。このダッシュボードはデフォルトで、local環境でのみアクセスできます。ですが、app/Providers/HorizonServiceProvider.phpファイル内には、認可ゲートの定義があります。この認可ゲートは、非ローカル環境におけるHorizonへのアクセスを制御します。Horizonインストールへのアクセスを制限するため、このゲートを必要に応じて自由に変更してください。The Horizon dashboard may be accessed via the /horizon route. By default, you will only be able to access this dashboard in the local environment. However, within your app/Providers/HorizonServiceProvider.php file, there is an authorization gate[/docs/{{version}}/authorization#gates] definition. This authorization gate controls access to Horizon in non-local environments. You are free to modify this gate as needed to restrict access to your Horizon installation:
/**
 * Horizonゲートの登録
 *
 * このゲートは非ローカル環境で、Horizonへアクセスできるユーザーを決定する。
 */
protected function gate(): void
{
    Gate::define('viewHorizon', function (User $user) {
        return in_array($user->email, [
            'taylor@laravel.com',
        ]);
    });
}
その他の認証戦略Alternative Authentication Strategies
Laravelは、認証したユーザーをゲートクロージャへ自動的に依存注入することを忘れないでください。アプリケーションがIP制限など別の方法でHorizonセキュリティを提供している場合、Horizonユーザーは「ログイン」する必要がない場合があります。したがって、Laravelの認証を必要としないようにするため、上記のfunction (User $user)クロージャの引数をfunction (User $user = null)に変更する必要があるでしょう。Remember that Laravel automatically injects the authenticated user into the gate closure. If your application is providing Horizon security via another method, such as IP restrictions, then your Horizon users may not need to "login". Therefore, you will need to change function (User $user) closure signature above to function (User $user = null) in order to force Laravel to not require authentication.
最大ジョブ試行回数Max Job Attempts
Note: これらのオプションを調整する前に、Laravelのデフォルトのキューサービスと「試行回数」の概念に確実に精通してください。[!NOTE] Before refining these options, make sure you are familiar with Laravel's default queue services[/docs/{{version}}/queues#max-job-attempts-and-timeout] and the concept of 'attempts'.
ジョブがスーパーバイザの構成内で利用できる最大試行回数を定義します。You can define the maximum number of attempts a job can consume within a supervisor's configuration:
'environments' => [
    'production' => [
        'supervisor-1' => [
            // ...
            'tries' => 10,
        ],q
    ],
],
Note: このオプションは、Artisanコマンドでキューを処理するときの
--triesオプションと類似しています。[!NOTE] This option is similar to the--triesoption when using the Artisan command to process queues.
triesオプションの調整は、WithoutOverlappingやRateLimitedなどのミドルウェアを使用する際に不可欠です。これらのミドルウェアは試行回数を消費するからです。これに対応するため、triesの設定値をスーパーバイザーレベルで調整するか、ジョブクラスで$triesプロパティを定義することで対応します。Adjusting the tries option is essential when using middlewares such as WithoutOverlapping or RateLimited because they consume attempts. To handle this, adjust the tries configuration value either at the supervisor level or by defining the $tries property on the job class.
triesオプションを設定しない場合、Horizonはデフォルトで1回だけ試行します。ただし、ジョブクラスで$triesを定義している場合は、その設定をHorizonの設定よりも優先します。If you don't set the tries option, Horizon defaults to a single attempt, unless the job class defines $tries, which takes precedence over the Horizon configuration.
triesか$triesを0に設定すると、試行が無制限になります。これは、試行回数が不明な場合に最適です。失敗を無限に繰り返すのを防ぐため、ジョブクラスに$maxExceptionsプロパティを設定し、許可する例外の数を制限できます。Setting tries or $tries to 0 allows unlimited attempts, which is ideal when the number of attempts is uncertain. To prevent endless failures, you can limit the number of exceptions allowed by setting the $maxExceptions property on the job class.
ジョブタイムアウトJob Timeout
同様に、スーパーバイザレベルでtimeout値を設定できます。この値は、ワーカプロセスがジョブを実行できる秒数を指定し、その時間が経過すると強制的に終了します。終了後、ジョブはキュー設定に従い再試行するか、失敗としてマークします。Similarly, you can set a timeout value at the supervisor level, which specifies how many seconds a worker process can run a job before it's forcefully terminated. Once terminated, the job will either be retried or marked as failed, depending on your queue configuration:
'environments' => [
    'production' => [
        'supervisor-1' => [
            // ...¨
            'timeout' => 60,
        ],
    ],
],
Warning!
autoバランス戦略を使用する場合、Horizonは進行中のワーカを「停止状態」と見なし、スケールダウン時にHorizonのタイムアウト経過後に強制終了します。Horizonのタイムアウトは常にジョブレベルのタイムアウトよりも長く設定してください。そうしないと、ジョブが実行途中で終了する可能性があります。加えて、timeoutの値は、常にconfig/queue.php設定ファイルで定義したretry_afterの値よりも、数秒短く設定する必要があります。そうしないと、ジョブが2回処理される可能性があります。[!WARNING] When using theautobalancing strategy, Horizon will consider in-progress workers as "hanging" and force-kill them after the Horizon timeout during scale down. Always ensure the Horizon timeout is greater than any job-level timeout, otherwise jobs may be terminated mid-execution. In addition, thetimeoutvalue should always be at least a few seconds shorter than theretry_aftervalue defined in yourconfig/queue.phpconfiguration file. Otherwise, your jobs may be processed twice.
ジョブ待機時間Job Backoff
backoff値をスーパーバイザレベルで定義することで、Horizonが未処理の例外が発生したジョブを再試行する前に、待機する時間を指定できます。You can define the backoff value at the supervisor level to specify how long Horizon should wait before retrying a job that encounters an unhandled exception:
'environments' => [
    'production' => [
        'supervisor-1' => [
            // ...
            'backoff' => 10,
        ],
    ],
],
「指数関数的」に待機時間を設定するには、backoff値に配列を使用します。以下の例では、最初の再試行の遅延は1秒、2回目の再試行は5秒、3回目の再試行は10、それ以降の再試行で試行回数が残っていれば毎回10秒ずつ遅延します。You may also configure "exponential" backoffs by using an array for the backoff value. In this example, the retry delay will be 1 second for the first retry, 5 seconds for the second retry, 10 seconds for the third retry, and 10 seconds for every subsequent retry if there are more attempts remaining:
'environments' => [
    'production' => [
        'supervisor-1' => [
            // ...
            'backoff' => [1, 5, 10],
        ],
    ],
],
非表示のジョブSilenced Jobs
アプリケーションやサードパーティパッケージが送信する特定のジョブを見たくない場合があるでしょう。こうしたジョブで「完了したジョブ」リスト上の領域を占有させずに、非表示にできます。最初の方法は、アプリケーションのhorizon設定ファイルにある、silenced設定オプションへジョブのクラス名を追加します。Sometimes, you may not be interested in viewing certain jobs dispatched by your application or third-party packages. Instead of these jobs taking up space in your "Completed Jobs" list, you can silence them. To get started, add the job's class name to the silenced configuration option in your application's horizon configuration file:
'silenced' => [
    App\Jobs\ProcessPodcast::class,
],
個々のジョブクラスを非表示にする機能に加え、Horizonではタグに基づくジョブの非表示もサポートしています。共通のタグを持つ複数のジョブを非表示にしたい場合に便利です。In addition to silencing individual job classes, Horizon also supports silencing jobs based on tags[#tags]. This can be useful if you want to hide multiple jobs that share a common tag:
'silenced_tags' => [
    'notifications'
],
別の方法は、表示しないジョブへLaravel\Horizon\Contracts\Silencedインターフェイスを実装します。このインターフェイスを実装したジョブは、silenced設定配列に存在しなくても、自動的に表示しません。Alternatively, the job you wish to silence can implement the Laravel\Horizon\Contracts\Silenced interface. If a job implements this interface, it will automatically be silenced, even if it is not present in the silenced configuration array:
use Laravel\Horizon\Contracts\Silenced;

class ProcessPodcast implements ShouldQueue, Silenced
{
    use Queueable;

    // ...
}
バランス戦略Balancing Strategies
各スーパーバイザーは、1つ以上のキューを処理できますが、Laravelのデフォルトのキューシステムとは異なり、Horizonでは3つのワーカバランス戦略を選択できます。auto、simple、falseです。Each supervisor can process one or more queues but unlike Laravel's default queue system, Horizon allows you to choose from three worker balancing strategies: auto, simple, and false.
自動バランスAuto Balancing
auto戦略(デフォルトの戦略)は、キューの現在の負荷に基づいて、各キューごとのワーカプロセスの数を調整します。例えば、notificationsキューに1,000件の未処理ジョブがあり、一方でdefaultキューが空の場合、Horizonはnotificationsキューへ追加のワーカを割り当て、キューが空になるまで継続します。The auto strategy, which is the default strategy, adjusts the number of worker processes per queue based on the current workload of the queue. For example, if your notifications queue has 1,000 pending jobs while your default queue is empty, Horizon will allocate more workers to your notifications queue until the queue is empty.
auto戦略を採用する場合、minProcessesとmaxProcesses設定オプションを構成することもできます。When using the auto strategy, you may also configure the minProcesses and maxProcesses configuration options:
minProcessesは、各キューあたりのワーカプロセスの最小数を定義します。この値は1以上でなければなりません。minProcessesdefines the minimum number of worker processes per queue. This value must be greater than or equal to 1.maxProcessesは、Horizonがすべてのキューに渡りスケールアップできるワーカプロセスの最大総数を定義します。この値は通常、キューの数にminProcessesの値を乗じた値よりも大きくする必要があります。スーパーバイザがプロセスを起動しないようにするには、この値を0に設定してください。maxProcessesdefines the maximum total number of worker processes Horizon may scale up to across all queues. This value should typically be greater than the number of queues multiplied by theminProcessesvalue. To prevent the supervisor from spawning any processes, you may set this value to 0.
例えば、各キューごとに最低1つのプロセスを維持し、合計で10個のワーカプロセスまでスケールアップするようにHorizonを構成してみましょう。For example, you may configure Horizon to maintain at least one process per queue and scale up to a total of 10 worker processes:
'environments' => [
    'production' => [
        'supervisor-1' => [
            'connection' => 'redis',
            'queue' => ['default', 'notifications'],
            'balance' => 'auto',
            'autoScalingStrategy' => 'time',
            'minProcesses' => 1,
            'maxProcesses' => 10,
            'balanceMaxShift' => 1,
            'balanceCooldown' => 3,
        ],
    ],
],
autoScalingStrategy設定オプションは、Horizonがキューに追加のワーカプロセスを割り当てる方法を決定します。2つの戦略から選択できます。The autoScalingStrategy configuration option determines how Horizon will assign more worker processes to queues. You can choose between two strategies:
time戦略は、キューをクリアするのにかかる総推定時間に基づいてワーカを割り当てます。Thetimestrategy will assign workers based on the total estimated amount of time it will take to clear the queue.size戦略は、キュー内のジョブ総数に基づいてワーカを割り当てます。Thesizestrategy will assign workers based on the total number of jobs on the queue.
balanceMaxShiftおよびbalanceCooldownの設定値は、Horizonがワーカの需要に対応するためにスケールする速度を決定します。上記の例では、毎秒3秒ごとに最大1つの新しいプロセスを作成または破棄します。アプリケーションの要件に応じ、これらの値を必要に合わせて自由に調整してください。The balanceMaxShift and balanceCooldown configuration values determine how quickly Horizon will scale to meet worker demand. In the example above, a maximum of one new process will be created or destroyed every three seconds. You are free to tweak these values as necessary based on your application's needs.
キューの優先順位と自動バランス調整Queue Priorities and Auto Balancing
autoバランス戦略を使用する場合、Horizonはキュー間の厳格な優先順位を強制しません。スーパーバイザの構成におけるキューの順序は、ワーカプロセスの割り当て方法に影響を与えません。代わりに、Horizonは選択されたautoScalingStrategyに基づいて、キューの負荷に応じてワーカプロセスを動的に割り当てます。When using the auto balancing strategy, Horizon does not enforce strict priority between queues. The order of queues in a supervisor's configuration does not affect how worker processes are assigned. Instead, Horizon relies on the selected autoScalingStrategy to dynamically allocate worker processes based on queue load.
例えば、以下の構成では、リストの最初に表示されているにもかかわらず、highキューをdefaultキューよりも優先しません。For example, in the following configuration, the high queue is not prioritized over the default queue, despite appearing first in the list:
'environments' => [
    'production' => [
        'supervisor-1' => [
            // ...
            'queue' => ['high', 'default'],
            'minProcesses' => 1,
            'maxProcesses' => 10,
        ],
    ],
],
キュー間の相対的な優先順位を強制する必要がある場合は、複数のスーパーバイザを定義し、処理リソースを明示的に割り当てる必要があります。If you need to enforce a relative priority between queues, you may define multiple supervisors and explicitly allocate processing resources:
'environments' => [
    'production' => [
        'supervisor-1' => [
            // ...
            'queue' => ['default'],
            'minProcesses' => 1,
            'maxProcesses' => 10,
        ],
        'supervisor-2' => [
            // ...
            'queue' => ['images'],
            'minProcesses' => 1,
            'maxProcesses' => 1,
        ],
    ],
],
この例では、デフォルトのqueueは最大10プロセスまでスケールアップ可能ですが、imagesキューは1プロセスに制限しています。この構成により、キューが独立してスケールできるようになります。In this example, the default queue can scale up to 10 processes, while the images queue is limited to one process. This configuration ensures that your queues can scale independently.
Note: リソースを大量に消費するジョブを実行するときは、
maxProcesses値を制限した専用のキューに割り当てるのが最善の策です。そうしないと、これらのジョブが過剰なCPUリソースを消費し、システムを過負荷状態に陥らせる可能性があります。[!NOTE] When dispatching resource-intensive jobs, it's sometimes best to assign them to a dedicated queue with a limitedmaxProcessesvalue. Otherwise, these jobs could consume excessive CPU resources and overload your system.
単純バランスSimple Balancing
simple戦略は、指定したキューにワーカプロセスを均等に分散します。この戦略では、Horizonはワーカプロセスの数を自動的にスケールしません。代わりに、固定数のプロセスを使用します。The simple strategy distributes worker processes evenly across the specified queues. With this strategy, Horizon does not automatically scale the number of worker processes. Rather, it uses a fixed number of processes:
'environments' => [
    'production' => [
        'supervisor-1' => [
            // ...
            'queue' => ['default', 'notifications'],
            'balance' => 'simple',
            'processes' => 10,
        ],
    ],
],
上記の例では、Horizonは合計10を均等に分割し、両キューに5つのプロセスを割り当てます。In the example above, Horizon will assign 5 processes to each queue, splitting the total of 10 evenly.
各キューに割り当てるワーカプロセスの数を個別に制御したい場合は、複数のスーパーバイザを定義できます。If you'd like to control the number of worker processes assigned to each queue individually, you can define multiple supervisors:
'environments' => [
    'production' => [
        'supervisor-1' => [
            // ...
            'queue' => ['default'],
            'balance' => 'simple',
            'processes' => 10,
        ],
        'supervisor-notifications' => [
            // ...
            'queue' => ['notifications'],
            'balance' => 'simple',
            'processes' => 2,
        ],
    ],
],
この設定により、Horizonはdefaultキューに10プロセス、notificationsキューに2プロセスを割り当てます。With this configuration, Horizon will assign 10 processes to the default queue and 2 processes to the notifications queue.
バランス戦略なしNo Balancing
balanceオプションをfalseに設定している場合、Horizonはキューをリスト順序通りに厳密に処理します。これはLaravelのデフォルトのキューシステムに類似しています。ただし、ジョブが蓄積し始めた場合、ワーカプロセスの数をスケールアップします。When the balance option is set to false, Horizon processes queues strictly in the order they're listed, similar to Laravel's default queue system. However, it will still scale the number of worker processes if jobs begin to accumulate:
'environments' => [
    'production' => [
        'supervisor-1' => [
            // ...
            'queue' => ['default', 'notifications'],
            'balance' => false,
            'minProcesses' => 1,
            'maxProcesses' => 10,
        ],
    ],
],
上記の例では、defaultキューのジョブは常にnotificationsキューのジョブよりも優先されます。例えば、defaultキューに 1,000 件のジョブがあり、notificationsキューに 10 件しかない場合、Horizon はnotificationsキューのジョブを処理する前に、defaultキューのすべてのジョブを完全に処理します。In the example above, jobs in the default queue are always prioritized over jobs in the notifications queue. For instance, if there are 1,000 jobs in default and only 10 in notifications, Horizon will fully process all default jobs before handling any from notifications.
Horizonのワーカプロセスのスケーリング機能を制御するため、minProcessesとmaxProcessesオプションを使用できます。You can control Horizon's ability to scale worker processes using the minProcesses and maxProcesses options:
minProcessesは、総ワーカプロセスの最小数を定義します。この値は1以上でなければなりません。minProcessesdefines the minimum number of worker processes in total. This value must be greater than or equal to 1.maxProcessesは、Horizon がスケールアップできる総ワーカプロセスの最大数を定義します。maxProcessesdefines the maximum total number of worker processes Horizon may scale up to.
HorizonのアップグレードUpgrading Horizon
Horizonの新しいメジャーバージョンへアップグレードするときは、アップグレードガイドを注意深く確認することが重要です。When upgrading to a new major version of Horizon, it's important that you carefully review the upgrade guide[https://github.com/laravel/horizon/blob/master/UPGRADE.md].
Horizonの実行Running Horizon
アプリケーションのconfig/horizon.php設定ファイルでスーパーバイザとワーカを設定したら、horizon Artisanコマンドを使用してHorizonを起動できます。この単一のコマンドは、現在の環境用に設定されたすべてのワーカプロセスを開始します。Once you have configured your supervisors and workers in your application's config/horizon.php configuration file, you may start Horizon using the horizon Artisan command. This single command will start all of the configured worker processes for the current environment:
php artisan horizon
horizon:pauseとhorizon:continue Artisanコマンドで、Horizonプロセスを一時停止したり、ジョブの処理を続行するように指示したりできます。You may pause the Horizon process and instruct it to continue processing jobs using the horizon:pause and horizon:continue Artisan commands:
php artisan horizon:pause

php artisan horizon:continue
horizon:pause-supervisorとhorizon:continue-supervisor Artisanコマンドを使用して、特定のHorizonスーパーバイザを一時停止/続行することもできます。You may also pause and continue specific Horizon supervisors[#supervisors] using the horizon:pause-supervisor and horizon:continue-supervisor Artisan commands:
php artisan horizon:pause-supervisor supervisor-1

php artisan horizon:continue-supervisor supervisor-1
horizon:status Artisanコマンドを使用して、Horizonプロセスの現在のステータスを確認できます。You may check the current status of the Horizon process using the horizon:status Artisan command:
php artisan horizon:status
特定のHorizon スーパーバイザの現在のステータスは、horizon:supervisor-status Artisanコマンドを使い、確認できます。You may check the current status of a specific Horizon supervisor[#supervisors] using the horizon:supervisor-status Artisan command:
php artisan horizon:supervisor-status supervisor-1
horizon:terminate Artisanコマンドを使用して、Horizonプロセスを正常に終了できます。現在処理されているジョブがすべて完了してから、Horizonは実行を停止します。You may gracefully terminate the Horizon process using the horizon:terminate Artisan command. Any jobs that are currently being processed will be completed and then Horizon will stop executing:
php artisan horizon:terminate
Horizonの自動再起動Automatically Restarting Horizon
ローカルでの開発中は、horizon:listenコマンドを実行してください。horizon:listenコマンドを使用すれば、更新したコードを読み込むためにHorizonを手作業で再起動する必要はありません。この機能を使用する前に、ローカル開発環境へNodeがインストールされていることを確認してください。さらに、ファイル監視ライブラリであるChokidarをプロジェクトへインストールする必要があります。During local development, you may run the horizon:listen command. When using the horizon:listen command, you don't have to manually restart Horizon when you want to reload your updated code. Before using this feature, you should ensure that Node[https://nodejs.org] is installed within your local development environment. In addition, you should install the Chokidar[https://github.com/paulmillr/chokidar] file-watching library within your project:
npm install --save-dev chokidar
Chokidarをインストールしたら、horizon:listenコマンドを使ってHorizonを起動します。Once Chokidar is installed, you may start Horizon using the horizon:listen command:
php artisan horizon:listen
DockerやVagrant内で実行する場合は、--pollオプションを使用します。When running within Docker or Vagrant, you should use the --poll option:
php artisan horizon:listen --poll
アプリケーションのconfig/horizon.php設定ファイル内の、watch設定オプションを使用して、監視対象のディレクトリやファイルを設定します。You may configure the directories and files that should be watched using the watch configuration option within your application's config/horizon.php configuration file:
'watch' => [
    'app',
    'bootstrap',
    'config',
    'database',
    'public/**/*.php',
    'resources/**/*.php',
    'routes',
    'composer.lock',
    '.env',
],
HorizonのデプロイDeploying Horizon
Horizonをアプリケーションの実際のサーバにデプロイする準備ができたら、php artisan horizonコマンドを監視するようにプロセスモニタを設定し、予期せず終了した場合は再起動する必要があります。心配ありません。以下からプロセスモニタのインストール方法について説明します。When you're ready to deploy Horizon to your application's actual server, you should configure a process monitor to monitor the php artisan horizon command and restart it if it exits unexpectedly. Don't worry, we'll discuss how to install a process monitor below.
アプリケーションのデプロイメントプロセス中で、Horizonプロセスへ終了するように指示し、プロセスモニターによって再起動され、コードの変更を反映するようにする必要があります。During your application's deployment process, you should instruct the Horizon process to terminate so that it will be restarted by your process monitor and receive your code changes:
php artisan horizon:terminate
SupervisorのインストールInstalling Supervisor
SupervisorはLinuxオペレーティングシステムのプロセスモニタであり、実行が停止するとhorizonプロセスを自動的に再起動してくれます。UbuntuにSupervisorをインストールするには、次のコマンドを使用できます。Ubuntuを使用していない場合は、オペレーティングシステムのパッケージマネージャを使用してSupervisorをインストールしてください。Supervisor is a process monitor for the Linux operating system and will automatically restart your horizon process if it stops executing. To install Supervisor on Ubuntu, you may use the following command. If you are not using Ubuntu, you can likely install Supervisor using your operating system's package manager:
sudo apt-get install supervisor
Note: もしSupervisorを自分で設定するのが大変そうに思えるなら、Laravelアプリケーションのバックグラウンドプロセスを管理できるLaravel Cloudの使用を検討してください。[!NOTE] If configuring Supervisor yourself sounds overwhelming, consider using Laravel Cloud[https://cloud.laravel.com], which can manage background processes for your Laravel applications.
Supervisor設定Supervisor Configuration
Supervisor設定ファイルは通常、サーバの/etc/supervisor/conf.dディレクトリ内に保管されます。このディレクトリ内に、プロセスの監視方法をスSupervisorに指示する設定ファイルをいくつでも作成できます。たとえば、horizonプロセスを開始および監視するhorizon.confファイルを作成しましょう。Supervisor configuration files are typically stored within your server's /etc/supervisor/conf.d directory. Within this directory, you may create any number of configuration files that instruct supervisor how your processes should be monitored. For example, let's create a horizon.conf file that starts and monitors a horizon process:
[program:horizon]
process_name=%(program_name)s
command=php /home/forge/example.com/artisan horizon
autostart=true
autorestart=true
user=forge
redirect_stderr=true
stdout_logfile=/home/forge/example.com/horizon.log
stopwaitsecs=3600
Supervisorの設定を定義する際には、stopwaitsecsの値が、最も長く実行されるジョブが費やす秒数より確実に大きくしてください。そうしないと、Supervisorが処理を終える前にジョブを強制終了してしまう可能性があります。When defining your Supervisor configuration, you should ensure that the value of stopwaitsecs is greater than the number of seconds consumed by your longest running job. Otherwise, Supervisor may kill the job before it is finished processing.
Warning! 上記の設定例は、Ubuntuベースのサーバで有効ですが、Supervisor設定ファイルの場所とファイル拡張子は、他のサーバオペレーティングシステムで異なる場合があります。詳細は、お使いのサーバのマニュアルを参照してください。[!WARNING] While the examples above are valid for Ubuntu based servers, the location and file extension expected of Supervisor configuration files may vary between other server operating systems. Please consult your server's documentation for more information.
Supervisorの開始Starting Supervisor
設定ファイルを作成したら、以下のコマンドを使用して、Supervisor設定を更新し、監視対象プロセスを開始できます。Once the configuration file has been created, you may update the Supervisor configuration and start the monitored processes using the following commands:
sudo supervisorctl reread

sudo supervisorctl update

sudo supervisorctl start horizon
Note: Supervisorの実行の詳細は、Supervisorのドキュメントを参照してください。[!NOTE] For more information on running Supervisor, consult the Supervisor documentation[http://supervisord.org/index.html].
タグTags
Horizonを使用すると、メール可能、ブロードキャストイベント、通知、キュー投入するイベントリスナなどのジョブに「タグ」を割り当てることができます。実際、Horizonは、ジョブに関連付けられているEloquentモデルに応じて、ほとんどのジョブにインテリジェントかつ自動的にタグを付けます。たとえば、以下のジョブを見てみましょう。Horizon allows you to assign "tags" to jobs, including mailables, broadcast events, notifications, and queued event listeners. In fact, Horizon will intelligently and automatically tag most jobs depending on the Eloquent models that are attached to the job. For example, take a look at the following job:
<?php

namespace App\Jobs;

use App\Models\Video;
use Illuminate\Contracts\Queue\ShouldQueue;
use Illuminate\Foundation\Queue\Queueable;

class RenderVideo implements ShouldQueue
{
    use Queueable;

    /**
     * 新しいジョブインスタンスの生成
     */
    public function __construct(
        public Video $video,
    ) {}

    /**
     * 仕事を実行
     */
    public function handle(): void
    {
        // ...
    }
}
このジョブがid属性は1のApp\Models\Videoインスタンスでキューに投入されると、タグApp\Models\Video:1が自動的に付けられます。これは、HorizonがジョブのプロパティでEloquentモデルを検索するためです。Eloquentモデルが見つかった場合、Horizonはモデルのクラス名と主キーを使用してジョブにインテリジェントにタグを付けます。If this job is queued with an App\Models\Video instance that has an id attribute of 1, it will automatically receive the tag App\Models\Video:1. This is because Horizon will search the job's properties for any Eloquent models. If Eloquent models are found, Horizon will intelligently tag the job using the model's class name and primary key:
use App\Jobs\RenderVideo;
use App\Models\Video;

$video = Video::find(1);

RenderVideo::dispatch($video);
ジョブに手作業でタグ付けるManually Tagging Jobs
Queueableオブジェクトの1つにタグを手作業で定義する場合は、クラスにtagsメソッドを定義します。If you would like to manually define the tags for one of your queueable objects, you may define a tags method on the class:
class RenderVideo implements ShouldQueue
{
    /**
     * このジョブへ割り当てるべきタグを取得
     *
     * @return array<int, string>
     */
    public function tags(): array
    {
        return ['render', 'video:'.$this->video->id];
    }
}
手作業によるイベントリスナのタグ付けManually Tagging Event Listeners
キュー投入したイベントリスナのタグを取得する場合、イベントのデータをタグへ追加できるように、Horizonは自動的にそのイベントインスタンスをtagsメソッドへ渡します。When retrieving the tags for a queued event listener, Horizon will automatically pass the event instance to the tags method, allowing you to add event data to the tags:
class SendRenderNotifications implements ShouldQueue
{
    /**
     * このリスナへ割り当てるべきタグを取得
     *
     * @return array<int, string>
     */
    public function tags(VideoRendered $event): array
    {
        return ['video:'.$event->video->id];
    }
}
通知Notifications
Warning! SlackまたはSMS通知を送信するようにHorizonを設定する場合は、関連する通知チャネルの前提条件を確認する必要があります。[!WARNING] When configuring Horizon to send Slack or SMS notifications, you should review the prerequisites for the relevant notification channel[/docs/{{version}}/notifications].
キューの1つに長い待機時間があったときに通知を受け取りたい場合は、Horizon::routeMailNotificationsTo、Horizon::routeSlackNotificationsTo、およびHorizon::routeSmsNotificationsToメソッドが使用できます。これらのメソッドは、アプリケーションのApp\Providers\HorizonServiceProviderのbootメソッドから呼び出せます。If you would like to be notified when one of your queues has a long wait time, you may use the Horizon::routeMailNotificationsTo, Horizon::routeSlackNotificationsTo, and Horizon::routeSmsNotificationsTo methods. You may call these methods from the boot method of your application's App\Providers\HorizonServiceProvider:
/**
 * 全アプリケーションサービスの初期起動処理
 */
public function boot(): void
{
    parent::boot();

    Horizon::routeSmsNotificationsTo('15556667777');
    Horizon::routeMailNotificationsTo('example@example.com');
    Horizon::routeSlackNotificationsTo('slack-webhook-url', '#channel');
}
待機通知の時間のしきい値の設定Configuring Notification Wait Time Thresholds
アプリケーションのconfig/horizon.php設定ファイル内で「長時間待機」と見なす秒数を設定できます。このファイル内のwaits設定オプションを使用すると、各接続/キューの組み合わせの長時間待機しきい値を制御できます。未定義の接続/キューの組み合わせの、長時間待機時間のしきい値はデフォルトで60秒です。You may configure how many seconds are considered a "long wait" within your application's config/horizon.php configuration file. The waits configuration option within this file allows you to control the long wait threshold for each connection / queue combination. Any undefined connection / queue combinations will default to a long wait threshold of 60 seconds:
'waits' => [
    'redis:critical' => 30,
    'redis:default' => 60,
    'redis:batch' => 120,
],
キューのしきい値を0に設定すると、そのキューに対する長時間待機通知が無効になります。Setting a queue's threshold to 0 will disable long wait notifications for that queue.
メトリクスMetrics
Horizonは、ジョブおよびキューの待ち時間とスループットに関する情報を提供する、メトリクスダッシュボードを用意しています。このダッシュボードを表示するには、アプリケーションのroutes/console.phpファイルで、Horizonのsnapshot Artisanコマンドを5分ごとに実行するように設定する必要があります。Horizon includes a metrics dashboard which provides information regarding your job and queue wait times and throughput. In order to populate this dashboard, you should configure Horizon's snapshot Artisan command to run every five minutes in your application's routes/console.php file:
use Illuminate\Support\Facades\Schedule;

Schedule::command('horizon:snapshot')->everyFiveMinutes();
メトリクスデータをすべて削除したい場合は、horizon:clear-metrics Artisanコマンドを呼び出します。If you would like to delete all metric data, you can invoke the horizon:clear-metrics Artisan command:
php artisan horizon:clear-metrics
失敗したジョブの削除Deleting Failed Jobs
失敗したジョブを削除したい場合は、horizon:forgetコマンドを使用します。horizon:forgetコマンドは、失敗したジョブのIDかUUIDを唯一の引数に取ります。If you would like to delete a failed job, you may use the horizon:forget command. The horizon:forget command accepts the ID or UUID of the failed job as its only argument:
php artisan horizon:forget 5
失敗したジョブをすべて削除したい場合は、horizon:forgetコマンドに--allオプションを指定します:If you would like to delete all failed jobs, you may provide the --all option to the horizon:forget command:
php artisan horizon:forget --all
キューのジョブをクリアClearing Jobs From Queues
アプリケーションのデフォルトキューからすべてのジョブを削除する場合は、horizon:clear Artisanコマンドを使用して削除します。If you would like to delete all jobs from your application's default queue, you may do so using the horizon:clear Artisan command:
php artisan horizon:clear
特定のキューからジョブを削除するためにqueueオプションが指定できます。You may provide the queue option to delete jobs from a specific queue:
php artisan horizon:clear --queue=emails